
A loose V-wheel carriage can often be snugged by adjusting its eccentric nut. For a loose V-wheel carriage, eccentric nut adjustment means turning the nut until the wheel is just at the point where it won’t turn, then tightening the bolts. The aim is a secure fit without simply forcing the wheel tighter.
If the carriage wobbles, it can be hard to tell whether the wheels, bolts or eccentric nuts are responsible. A careful adjustment is a practical first step: it changes how firmly the wheel sits against the rail without relying on guesswork or overtightening.
Here, you’ll learn how to recognize looseness, adjust the eccentric nut carefully and check the carriage’s movement afterwards. You’ll also learn when recurring looseness may point to a problem that needs more than another turn of the nut.
Key Takeaways
- Learn how an eccentric nut changes the V-wheel’s contact with the rail to take up carriage play.
- Make small adjustments and stop when the wheel is just at the point where it won’t turn, then tighten the bolts.
- Check that the carriage feels secure while still moving smoothly along the rail.
- Spot when looseness keeps returning and may need attention beyond another adjustment.
- See how 3D Printing Canada’s repair services can help when carriage hardware issues persist.
Eccentric nut adjustment v-wheel loose carriage
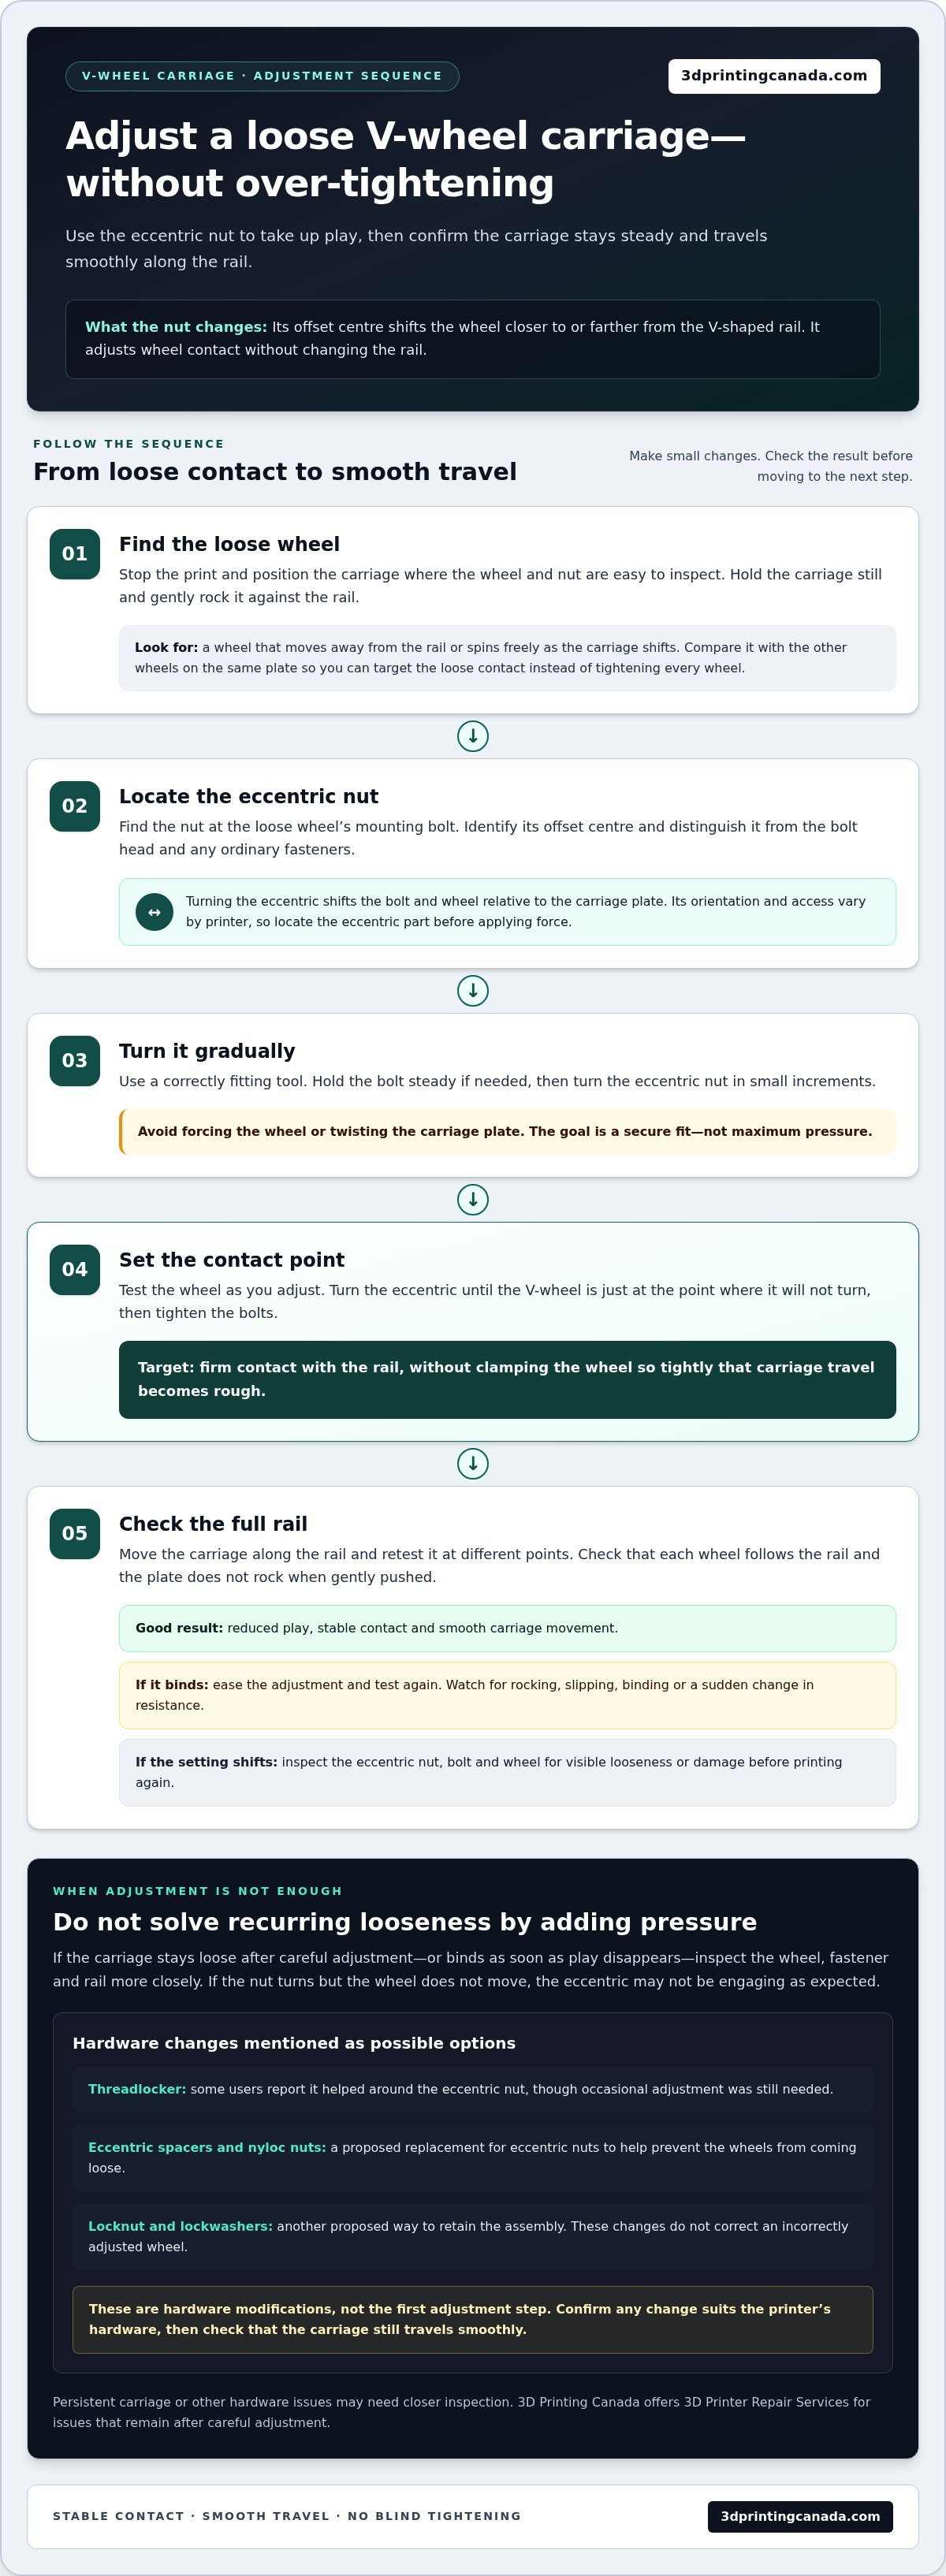
A loose V-wheel carriage can shift on its rail, creating play where it should sit securely. The eccentric nut changes the wheel’s position relative to the carriage plate. Turning it moves the wheel closer to or farther from the V-shaped rail, taking up looseness without changing the rail. Make small adjustments, then check the wheel’s contact and the carriage’s movement.
Before turning anything, identify which wheel is loose. Hold the carriage still and gently try to rock it against the rail. Look for a wheel that moves away from the rail or spins freely as the carriage shifts. Compare it with the other wheels on the same plate. This helps pinpoint the loose contact instead of tightening every wheel unnecessarily.
The eccentric nut sits on the wheel’s mounting bolt. Its offset centre shifts the bolt and wheel as the nut turns. This lets you adjust wheel pressure without adding shims or changing the rail. Because the nut’s orientation and access vary by printer, locate the eccentric part before applying force.
Use this adjustment sequence:
- Stop the print and position the carriage. Choose a reachable spot on the rail where you can inspect the wheel and nut clearly.
- Locate the eccentric nut. Check the loose wheel’s mounting point and distinguish the offset nut from the bolt head and any ordinary fasteners.
- Hold the bolt steady if needed. Use a correctly fitting tool on the bolt head, then turn the eccentric nut gradually. Avoid forcing the wheel or twisting the carriage plate.
- Test the wheel as you adjust. Turn the eccentric until the V-wheel is just at the point where it will not turn, then tighten the bolts. The wheel should contact the rail without being clamped so tightly that carriage travel becomes rough.
- Move the carriage along the rail. Check for rocking, slipping, binding or a sudden change in resistance. If the carriage binds, ease the adjustment and test again.
The goal is a stable fit, not maximum pressure. If the carriage stops rocking but feels stiff partway along the rail, the wheel may be too tight or contact with the rail may vary. Recheck the same wheel as the carriage moves. Smooth travel and reduced play matter more than making the wheel impossible to turn.
After adjusting the nut, retest the carriage at different points along the rail. A wheel that feels secure at one end may reveal looseness or binding elsewhere. Check that each wheel follows the rail and that the carriage plate doesn’t rock when gently pushed. If the adjustment shifts during movement, inspect the eccentric nut, bolt and wheel for visible looseness or damage before printing again.
Repeated movement can loosen hardware, so a recurring problem may need more than another turn. Some users report that threadlocker around the eccentric nut helped, though occasional adjustment was still needed. Other suggested options include replacing eccentric nuts with eccentric spacers and nyloc nuts, or securing the nut with a locknut and lockwashers. These are hardware modifications, not the first adjustment step.
Start with the existing eccentric nut and assess the result before considering a modification. If the nut turns but the wheel doesn’t move, the eccentric may not be engaging as expected. If the carriage remains loose after careful adjustment, or binds as soon as the play disappears, inspect the wheel, fastener and rail more closely. Adjustment works best when the wheel and mounting hardware can move freely into consistent contact.
The carriage should remain steady throughout its travel, with no wheel lifting away or sudden resistance. If looseness returns after adjustment, inspect the wheel mounting and nut again rather than increasing pressure blindly. One proposed alternative is replacing eccentric nuts with eccentric spacers and nyloc nuts to help prevent the wheels from coming loose. This is a fastening modification, not part of the adjustment itself, so make sure it suits the printer’s hardware before changing components.
Another proposed modification is to secure an eccentric nut with a locknut and lockwasher on the nut end, and a lockwasher on the bolt-head end. Such arrangements change how the assembly is retained; they don’t correct an incorrectly adjusted wheel. Keep the wheel aligned with the rail, and confirm that the carriage still travels smoothly after any hardware change. If you can’t achieve both smooth movement and stable contact, revisit the alignment and mounting fit.
3D Printing Canada: Bambu Lab Accessories
3D Printing Canada offers 3D Printer Repair Services for persistent carriage or other hardware issues that remain after careful adjustment. If the wheel still feels loose, the carriage binds, or the eccentric nut won’t hold its position, repair support can help address the printer’s mechanical problem. This is a practical next step when further turning the nut doesn’t restore smooth, secure carriage movement.
For Bambu Lab printer owners looking for accessories, 3D Printing Canada also offers Bambu Lab Accessories. Choose the path that fits your need: repair support for a hardware fault, or accessories for your printer setup. A loose V-wheel carriage adjustment is a mechanical task, so accessories alone won’t resolve a wheel or fastener issue.
Contact 3D Printing Canada to discuss 3D printer repair services or Bambu Lab Accessories.
Keep Your Printer Ready for the Next Project
A reliable carriage supports consistent motion, and changes in its movement can signal that the printer needs attention. Watch for changes during routine use, and treat recurring mechanical trouble as a reason to pause rather than force a quick adjustment. Adjusting the eccentric nut on a loose V-wheel carriage can help restore a secure fit, while ongoing problems may call for a closer inspection of the printer’s hardware.
As your projects grow, the right parts and support can help you keep your setup aligned with the work you want to do. 3D Printing Canada offers Bambu Lab Accessories, 3D Printer Repair Services, and expert guidance. Choose the next step that fits your printer and your project, whether that means addressing a mechanical issue or exploring what else can support your making.
Contact 3D Printing Canada to take the next step with your printer. Keep creating with confidence, one well-maintained part at a time.